2 Ekim 2012 Salı

Orange Cranberry White Chocolate Zucchini Bread

To contact us Click HERE
My friend Missy is a fabulous cook and brought this amazing bread to the bus stop the other day. We were all oohing and awing over how amazing it was and she was kind enough to send me the recipe. It was unlike any zucchini bread I have ever tasted. The zucchini flavor (and even specks) are very minimal, so you think you are eating just an extremely moist orange cranberry bread. However, the addition of the white chocolate chips are heaven sent! The combination of all of the flavors was a perfect 10 in my book. This recipe will also be a great one to use with my frozen, grated zucchini in my freezer during holiday season. Flavorful, moist, sweet & superbly yummy!! Thanks Missy for another great recipe ;)

Orange Cranberry White Chocolate Zucchini Bread3 eggs
1/2 c. sour cream
1/2 c. canola or vegetable oil
1 1/2 c. sugar
 1 3/4 c. grated zucchini
1/4 c. orange juice
2 T. orange zest
1 t. vanilla
1/2 t. salt
1 t. baking soda
1/4 t. baking powder
3 c. flour
1 1/2 c. craisins
1 1/2 c. white chocolate chips
Mix all of the ingredients together well.  Put into 2 greased and floured bread pans.  Bake at 325 degrees for 1 hour or until tests done. Remove from oven, let rest for 10 minutes and then remove from pan. Serve warm or cold.

Butterscotch Dream Cake & Birthday Fun!

To contact us Click HERE
I can't believe summer has almost come and gone. Besides the regular summer fun, our family celebrates everyone's birthday's in our family except for mine. This makes for busy and exciting months of parties, cake decorating and lots of family togetherness and food! I wanted to share some of my favorite birthday events of the summer in case you need easy birthday ideas for your next summer gatherings.

Bike parade and pizza party--this was the easiest and most fun birthday party I have ever thrown for my kids. The simplicity of it was maybe what I loved most, but thankfully I think the kids had a blast too! My son and his boy cousins all celebrate their birthday's in the summer and so we decided to have a bike parade for their birthday's. We had over 25 kids there (ah! Are we crazy or what?!?) and thankfully didn't lose anyone. The kids decorated their bikes, rode around the park walkway, ate pizza and had ice cream sandwiches for dessert. We played a few simple party games and off they went. Simple, inexpensive and super fun!!

Cake-pop ice cream cones--my neice Alayna had a really fun birthday party and these cake pops from Bakerella were the hit of the night! The kids couldn't get over how much they looked like a dipped ice cream cone. The ooey-gooey cake center was a fun surprise for everyone. I have to admit, I downed mine quicker than my children did. It was sweet, chocolatey and the perfect dessert for even someone my age ;)

Hawaiian Luau--my daughter turned the big number 12 and so we had to do something special for her. We invited her friends over and had a special Hawaiian Luau. My favorite part of the event was all of the delicious food. I stuffed those girls silly! We had simple ham sandwiches with all of the yummy fixings, pina colodas, fruit shishkabobs, coconut cream cupcakes, veggies & dip and homemade coconut ice cream. Aloooha!
Chocolate Flourless Cake--if you crave chocolate and love the deep, bitter chocolate flavor, you will love this flourless cake! My sister Diana made it for my other sister's birthday and we all went to bed with a chocolate, caffeine headache. With fresh berries and real whipping cream this cake was decadent. The only change I would do from the recipe is I would use milk chocolate instead of semi-sweet. I like my chocolate a little more sweet than bitter, but that would just depend on your preference. Both ways are chocolate heaven ;)


One of my all-time favorite birthday cake recipes EVER! My mother-in-law makes this Butterscotch Dream Cake every year for my birthday or my father-in-laws and it is melt in your mouth yummy!! The caramel penuche frosting is fudgy, smooth and totally buttery amazing. I could eat the frosting by the spoonful...okay, I do when I make it ;) This picture doesn't do this recipe justice. We ate the entire cake the night before except for this little piece I could save for a picture the next day. The frosting starts to crack as it sits overnight, but don't worry, the flavor is still just as amazing...cracks or no cracks ;)


Butterscotch Dream Cake with Caramel Penuche Frosting
1 butter pecan cake mix
1/2 c. flour
1 small package butterscotch pudding
1 pkg. dream whip, dry mix
1 3/4 c. water
1/3 c. oil
3 large eggs
Whip all of the above on medium speed for 4 minutes. Put in 3 greased and floured 9 inch cake pans (or a 12x12 pan...or, you can put it in a 9x13 pan and make 2-3 cupcakes as well). Don't pour the entire mix into a 9x13 or it might overflow and make a mess.Bake at 350 degrees for about 21 minutes, or until cake pulls away from the edge or toothpick comes out clean.
Caramel Penuche Frosting:
1/2 c. butter, melted
1 c. brown sugar
1/2 c. hot milk
2-3 c. powdered sugar
While cake is cooking in the oven, make the frosting on the stove in a medium sized saucepan.  To the pan add the butter and brown sugar.  Boil for 1 minute, or until sugar seems to dissolve.  Add the hot milk (microwave for a minute or so until hot) and then add it to the sugar/butter mixture.  Beat the milk into the mixture until smooth.  Add the powdered sugar until frosting is a spreading consistency.  The frosting will thicken quickly as it cools, so don't add too much powdered sugar or it will be too stiff to frost.  As soon as the cake comes out of the oven, frost with the penuche frosting as quickly as you can.  If the frosting becomes too thick, add a little more milk and continue to beat until smooth and creamy.

Swimming birthday parties...swim, eat, play--can't get easier than that ;) I love this picture! The care free life of kids is so refreshing isn't it?
 

Strawberry Cheesecake Pretzel Jello

To contact us Click HERE
 It is almost Labor Day and time for one last barbecue of the season! I am posting this recipe, not because I created it, and not because it will be new to many of you, but because I am tired of searching through my recipe books to find it everytime I want to make it. Most of you have probably already had this heavenly combination of sweet cheesecake and salty pretzel crust, but if you haven't, you need to put this recipe on your Labor Day menu plans! This is 'technically' a salad, but I have also made it as a dessert. Pretty much I have eaten it  for breakfast, lunch and dinner and been perfectly happy every time! ;) Enjoy and have a great weekend!
Strawberry Cheesecake Pretzel JelloCrust:2 1/2 c. pretzels3/4 c. butter, melted1/4 c. sugarPlace the above three ingredients into a food processor and blend until the pretzels are ground and the mixture is smooth and moist. Pour the mixture into a 9x13 pan that has been sprayed with cooking spray and  press so it is evenly over the bottom of the dish. Bake at 375 for 12-13 minutes, or until it is lightly golden brown.Cream Cheese Filling:8 oz. cream cheese, softened1 c. sugar 1 t. vanilla8 oz. Cool Whip Topping (or 1 c. heavy whipped cream)In a bowl, beat together with an electric mixer the cream cheese and sugar until completely smooth. Add the vanilla and fold in the Cool Whip Topping. Once the crust has cooked and cooled, spread the cream cheese mixture over the cooled crust and return to the fridge. While the crust is cooling, make the jello topping:Strawberry Topping:1 3/4 c. water1 large strawberry Jello package3 c. strawberries (frozen or fresh)1 c. fresh strawberries (for garnish on the top of the salad)In a large glass bowl place the water in the microwave for 4-5 minutes, or until boiling happens. Remove from the microwave and pour in the Jello. Stir until the Jello has dissolved. Add the sliced strawberries to the Jello. I like my topping more pureed and smooth, so I use my hand wand blender and blend the strawberries and Jello just a little so there aren't large chunks in the topping. Place the jello mixture into the fridge for 15-20 minutes, or until it begins to firm up (if you use frozen berries this will only take about 5 minutes).  When the crust has been cooled and the cream cheese mixture has been spread over the crust, pour the strawberry jello mixture over the cream cheese layer. Spread out evenly over cream cheese layer.  Place the salad in the fridge for a couple of hours and serve with fresh strawberries sliced on top.
*We love this recipe with several different combinations. During peach season we love to use Peach jello with fresh sliced peaches. We also love it with fresh and frozen blueberries and blackberry jello or raspberries with raspberry jello. The combinations are endless and delicious!

Raspberry Cream Cheese Brownies

To contact us Click HERE
There are few things better than berries with chocolate. I love the combination of the tart fruit with the rich, dark chocolate. These brownies remind me of those raspberry sticks my mom used to buy during the holidays. I found this recipe in an old cook book of my grandma's and it was everything I hoped it would be! The brownie layer could possibly be my new favorite brownie recipe. It was a totally different texture than my regular brownie recipe (which I still LOVE for frosting), but it was more like a chocolate truffle. The melted chocolate in the recipe was what gives it that rich, smooth texture that was so amazing!  Besides the delicious brownie layer, the cream cheese raspberry layer almost tastes like a mousse. Drizzle more chocolate on top and voila! You have an amazing new dessert recipe that will make you the hit of any get together or party!!


Raspberry Cream Cheese Brownies
Brownies:
1 1/4 c. milk chocolate chips (or semi), melted
1/2 c. butter
Combine together until smooth. and then add:
3/4 c. brown sugar
2 eggs
3/4 c. flour
1/2 t. baking powder
1 t. vanilla
1/2 t. salt
Place in a greased 9 x13 pan and bake at 350 for 25-30 minutes.
Filling:
1 c. white chocolate chips, melted
8 oz. cream cheese
1/4 c. powdered sugar 1
1/4 c. raspberry jam
Beat together the cream cheese, sugar and jam until smooth. Melt the white chocolate chips and add to the cream cheese portion. Beat until smooth and combined together.
When the brownies have been removed from the oven, let them cool until no longer warm. Spread the cream cheese filling over the brownies evenly.
 1/4 c. raspberry jam, heated until runny (may need to add a tinch of water)
Drizzle (or drop) the jam randomly over the brownies (it doesn't need to be uniform, you will spread it later).
Glaze:
1/3 c. milk or semi chocolate chips
1 t. butter
Melt the chocolate chips and the butter together until the chocolate is smooth. With a fork, drizzle the chocolate in a criss cross manner lengthwise on the brownies. When all of the glaze has been drizzled on the brownies, take a knife and press softly on the top of the brownies in long, lengthwise rows on the brownies. Do this every couple of inches apart and it should swirl the jam and chocolate into pretty lines down the brownies.  If this is too complicated, just swirl the chocolate and jam until it looks pretty ;) 
(Okay, my drizzling skills leave much to be desired! Straight lines or not, these brownies are scrumptious! :)

September is National Preparedness Month

To contact us Click HERE
FEMA has declared September "National Preparedness Month". To help us kick off this month we are partnering up with the company that makes one of our favorite emergency preparedness products, the Sun Oven. We have owned our Sun Oven over a year and have loved the great way that we can cook, boil/purify water, bake, dehydrate, etc. with it.  The best part about it is no fuel is needed and the Sun is pretty reliable.  You can use it all year long including during the winter, for camping, or for an emergency.  Here is a link to one of our several posts that we have made that shows some of the ways we have used it.

     In honor of the National Preparedness Month, Global Sun Ovens has created a preparedness package and is offering Deals to Meals readers a great deal on the preparedness package or just the Sun Oven by itself. Click on this link or the button on the right for more details. You can also use their website for great tips on solar cooking, recipes, functionality and other preparedness tips.


Global Sun Oven is also having a preparedness contest and will be giving away 4 Sun Ovens, 8 Dehydrating and Preparedness Accessory Packages, and 12 Multi-Level Dehydrating & Baking Rack Sets. Click here for additional information. 


1 Ekim 2012 Pazartesi

Along Came A Spider…

To contact us Click HERE

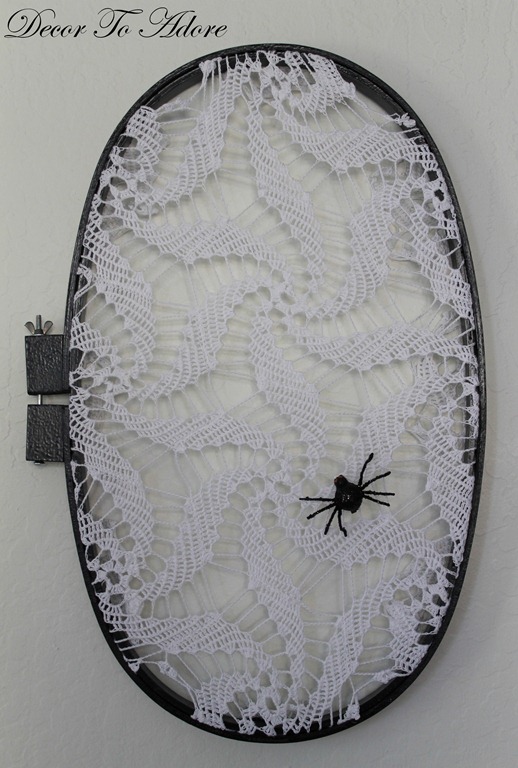
Thank you so very much for your kind comments about yesterday’s fantle” ~ faux fall mantle. As promised here is the easy peasy tutorial on how to create your own spooktacular web.

spider 005-001

I opened my boxes of fall décor on Saturday and was once again reminded that all of our holiday décor was in traditional harvest colors.  I was ready for something new but had no budget. So I spent the weekend painting, primping and giving all of the interior accessories a soft neutral palette.

Afterwards I thumbed through the most recent issue of Country Living looking for a bit of inspiration. I really loved the “Arsenic and Old Lace feature”.

I was inspired since I have an entire trunk filled with vintage and antique handiwork. Now while I didn’t have any old frames lying around I did have a handmade gift that was enjoyed all through the 90’s. (If you’re a certain age you probably had “country décor” too. :) I always thought that the shape of this embroidery hoop was…eerie. So I disassembled the wall hanging and spray painted the hoop black.

fantel 002

I rustled through my doily stash and found an small oval dresser scarf that fit almost perfectly.  The lace was sandwiched between the two rings and tightened down. I propped it up against the wall and it was almost immediately proclaimed by Sweet Boy to be “awesome”. Which was quickly followed with “It needs a spider.” Which it DID! I dug around and found an old plastic spider ring and it wasn’t quite… right. I went to Michaels for some other supplies and found two glitter spiders on sale for a little over a dollar. The bonus was that their underbelly’s featured a wee spring clothespin that I easily clipped on to the lace.

fantel 038

Glitter makes everything better.

spider 005-002

I thought that a grouping of “wall webs” would be fun. While I was at the craft store I did price embroidery hoops and the large specimens were around $15.00. Holy golden webs Spiderman! So I cruised by Goodwill and found an empty hoop for $1.00 and I will be on the lookout for a few more.

spider 011

Until then, one is fun.

Laura

Linking to:

Today’s Creative Blog, Someday Crafts, SSS, Shabby Nest, Tatertots and Jello, Positively Splendid, The 36th Avenue, SNS, Thrifty Décor Chick

© 2012 Decor To Adore Laura Ingalls Gunn All Rights Reserved

Fall Fairyland Forest

To contact us Click HERE

There is nothing like capturing a bit of autumnal bliss under glass.

fall under glass 068-002

Last Christmas I, along with 8000 other bloggers, created a bit of holiday happiness in a glass container. I chose a gumball jar for my creation.

  dta 151

Earlier this week I was scrolling through fall images and came across this lovely gem.

I immediately thought “Yes! Now I know what to do with those leftover plastic deer and bottle brush trees!”

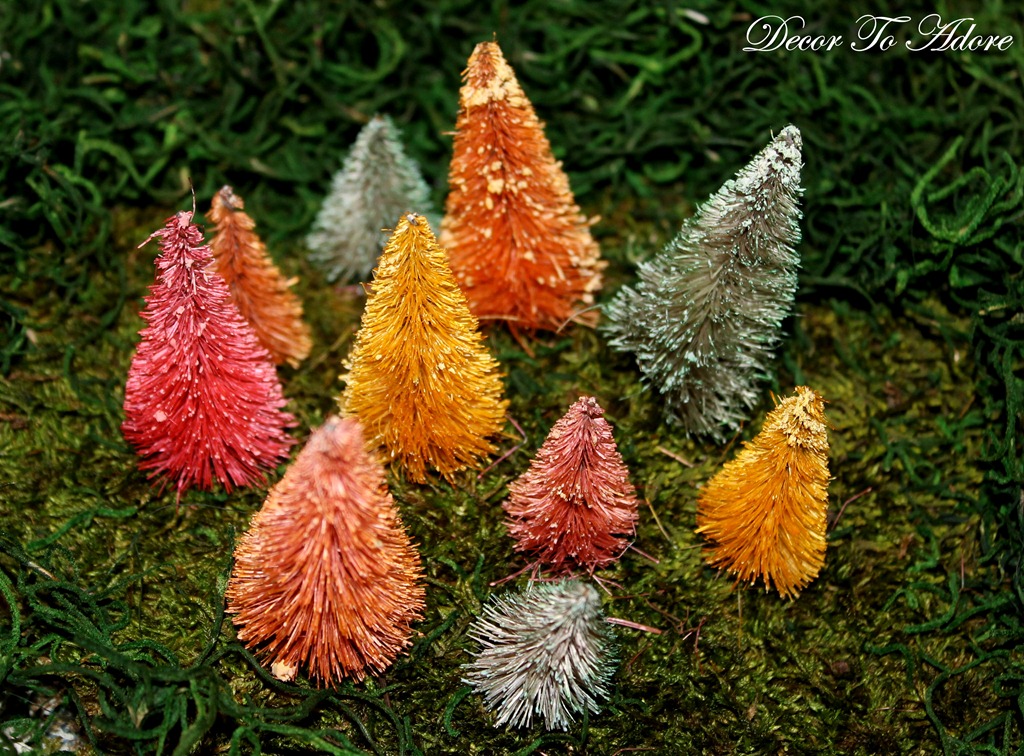
But the trees needed to be in autumnal colors so I busted out the bleach. It takes about 20 minutes to get the job done. I use 1/4 cup per gallon of hot water.

I mixed up some food coloring (But next time I would probably use RIT dye for a more vibrant color.) and gave the bleached trees a swish of color.

fall under glass 039

As I had absolutely no décor on my dining table so I decided to lay everything out on a tray to create a centerpiece. For awhile I was stuck on “What the heck do I use as ground cover? Faux snow will not work.” Then it came to me. Moss. I had two types leftover from when I made my spring terrariums. You can purchase a whole bag of it at Joann’s for $3.99. Make sure you use a 40% off coupon. :)

fall under glass 012

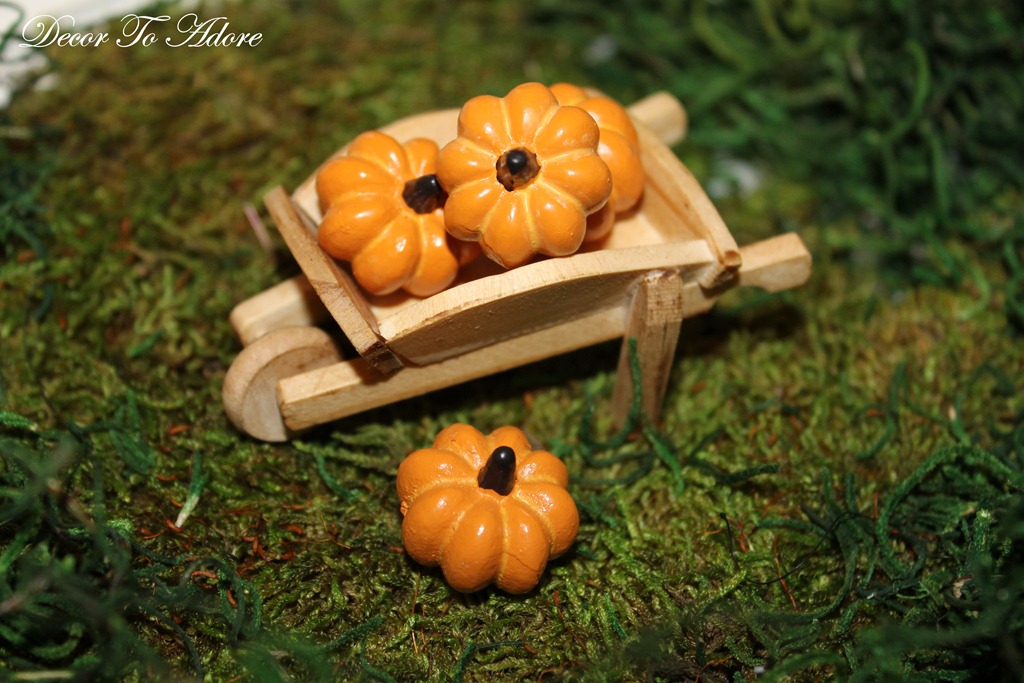
I then searched around for other miniatures inside the Fashionista’s dollhouse and found this wheelbarrow. The wee pumpkins were purchased at Hobby Lobby. 

fall under glass 018

Everything is cuter in miniature.

forest 010

I broke up the large expanse of green by tucking in some yellow mums. When these wither they will probably be replaced with faux flowers.

fall under glass 071

Sweet boy thought we should set the scene outside on the patio.

forest 041

But it was really hot so it was brought back inside.

fall under glass 068-001

I think I’ll add in some willow chargers, yellow napkins and maybe a bit of colored dishware to the table.

fall under glass 007

Do you have a fall centerpiece on your table?

Laura

Linking to:

The Charm of Home, Common Ground, StoneGable, Between Naps On The Porch, Today’s Creative Blog,Someday Crafts, SSS, Shabby Nest, Tatertots and Jello, Positively Splendid, The 36th Avenue, SNS, A Stroll Thru Life, Thrifty Décor Chick